Challenge 2: Create a Build Workflow
With the code loaded, it's now time to make sure the code works! Your task is to validate the code builds correctly using GitHub Actions. DevOps concepts covered:
- Building
- Testing
This challenge is focused on building an Continuous Integration (sometimes known as CI or Build) workflow that will compile your code, run unit tests and package up the code, ready for release.
Having the code working on your device is great for testing, but we need to deploy this solution so our users can also test it!
GitHub hosts build agents that can build your code and package it up ready for release. Having code built using these build agents allows code to be built in a consistent and repeatable fashion, ensuring only proper code goes into the build.
Having the compiled code packaged up at this step also helps to enforce the same code is being tested in a staging environment before it is deployed to production.
For the following exercises you may choose to collaborate on a single build workflow, or each team member can create their own build workflow:
Exercise 1
We will be creating a YAML workflow that defines the build process for our code. Manually executing a build workflow when code is updated can be tedious if your code changes often. Fortunately, GitHub Actions contain functionality to automate this process for you.
- Create a YAML workflow to build your code and produce artifacts for deployment.
- Setup a build trigger to ensure that the workflow runs when:
- Any changes are made to the main branch
Hints
- You will need to include the
Upload a Build Artifactaction to produce build artifacts. - Check the logs of the workflow run if you are unsure of the path to the web portal folder that will be used to create the artifact.
- If each team member has chosen to make their own build workflow, make sure that you update the name of the build workflow to include your own name. This will help reduce confusion over who owns each workflow. Entering your name as a comment in the workflow commit message may also be helpful.
- If you use the .NET Core starter workflow you will have to remove the pull request trigger and dotnet test sections as these are covered in a later exercise.
- The web portal is the only project file that needs to be built into the artifact. To keep things clean, you should output the published files into their own folder that can be easily referenced by the upload artifact step.
- Most of the
dotnet *commands will implicitly run other commands that are required as a prerequisite, for exampledotnet publishwill run Thedotnet build,dotnet test,dotnet publishwill rundotnet restoreanddotnet buildby default. If you are already explicitly completing these steps, then you can pass flags to the command to skip steps that have already been explicitly run. This can speed up your pipeline be skipping redundant steps, see the documentation here. - Examples are
--no-buildand--no restore, where applicable setting--no-buildalso implicitly sets the--no-restoreflag.
- Most of the
- If you are having trouble with finding where files are located, try adding the following step inside a workflow job:
  - name: List out directory contents
    run: |
        echo "Listing the contents of the GitHub workspace directory"
        ls ${{ github.workspace }}

        echo "Recursively listing all contents of the current directory"
        ls -R
Helpful resources
- Getting started with GitHub Actions
- Setting up continuous integration using GitHub Actions
- Configuring a workflow
- Events that trigger workflows
- Starter Workflows
- dotnet publish
- Upload a Build Artifact action
- Context and expression syntax for GitHub Actions
Exercise 2
In order to support the GitHub flow pattern, pull requests should trigger your build workflow, that way you know the changes will be deployable before they are integrated. Automated testing to ensure code quality and integrity by running tests as part of the workflow should also be added.
- Set up automatic builds on the master branch and any time a pull request is made.
- (Optional) Add some new unit tests to the
AnimalAdoption.Web.Portal.UnitTestsproject. - Update your build workflow to have a step where unit tests are run to reduce the chance that code changes introduce bugs in the future.
Hints
- The example functional test
AnimalAdoption.Web.Portal.FunctionalTestsproject is used later on as an example of testing the solution end to end. This test is not required to be run during the build step and can be ignored for now. AnimalAdoption.Web.Portal.UnitTests\CartLogic.cshas an example of a back end unit test.- Unit tests should be small and cover specific functions. Refer to the helpful resources links below to ensure that your unit test isn't testing too much at one time.
- Investigate code coverage, it can indicate areas of the code that may need testing.
- If you do find a bug it can be good practice to write a unit test first covering the expected behaviour and then fix the bug to ensure it does not occur in the future.
Helpful resources
- GitHub flow
- Events that trigger workflows
- Unit Testing Best Practices
- Unit Testing in .NET Core and .NET Standard
Exercise 3 (Optional)
You may have noticed that the web portal project contains a solution named AnimalAdoption.Common.Logic. This package holds all the important business logic required for the website to function.
Tailspin Animal Adoptions has plans to move to a microservices architecture in the future, however, they want to reuse the existing logic found in this project.
As this "Logic Library" is not in the same repository as the repository they want to use, they are unable to use that library unless they clone all the code in your repository. This also makes it a bit more complicated as they want to ensure that they test any changes to the library. This means that they can't just grab the latest master branch.
We can resolve these issues by packaging up AnimalAdoption.Common.Logic in the build process and publishing them as a NuGet package to a GitHub Packages Repository (GPR). The resulting package can be versioned and consumed as NuGet packages by other teams that have access.
- Add the required entries inside the
<PropertyGroup>section of the logic libraryAnimalAdoption.Common.Logic.csprojfile.
    <Version>1.0.0</Version>
    <RepositoryUrl>https://github.com/(your-organisation-name)/(your-repo-name).git</RepositoryUrl>
<RepositoryType>git</RepositoryType>- Update your build pipeline to publish the logic library to a GPR as a NuGet package.
- Confirm that a package was published to your organization.
- Optional: Update the workflow to only push your package if running on the master branch.
Hints
- In order to publish a NuGet package to a GPR, you will need to:
- Authenticate to the GPR
- Build & Pack the project
- Push to the GPR
- Using a versioning system such as semantic versioning can help consumers understand what changes have taken place and the level of testing required when updating packages. The version can be set inside the project, or overridden in the pipeline.
- The library in this case is used as an example, however, this method can be used also to package up useful internal libraries that you may use in more than one project but do not want to publish.
- GitHub Package Repositories support other popular library formats such as npm, Maven, Gradle, Docker.
- To view published packages on the home page of your organization, you may have to do a force refresh.
- If you get really stuck, check out the spoiler below to get you back on the right track.
Helpful resources
- Setup .NET Core SDK Action
- dotnet pack examples
- dotnet nuget push
- Using environment variables
- About GitHub Packages
- Viewing an organization's packages
- Create a NuGet package using the dotnet CLI
Spoilers
Spoiler
    # Set these variables at either the step or workflow level
    env:
      GitHubPackageFeedUrl: https://nuget.pkg.github.com/(your-organisation-name)/index.json
      LogicProjectPath: ${{ github.WORKSPACE }}/AnimalAdoption.Common.Logic

    # Authenticates packages to push to GPR
    - name: Setup .NET Core @ Latest
      uses: actions/setup-dotnet@v1
      with:
        source-url: ${{ env.GitHubPackageFeedUrl }}
      env:
        NUGET_AUTH_TOKEN: ${{ secrets.GITHUB_TOKEN }} # GitHub automatically creates a GITHUB_TOKEN secret to use in your workflow

    - name: Package up project
      run: dotnet pack --configuration Release ${{ env.LogicProjectPath }}

    - name: Push package to GitHub registry
      run: dotnet nuget push ${{ env.LogicProjectPath }}/**/*.nupkg --skip-duplicate
Exercise 4
Now that we have a number of processes building, testing, publishing and releasing our code, we want to be notified of potential issues. Make sure that build email notifications are enabled. These may also be enabled by default.
One of the downfalls of email notifications is that it is hard for the rest of the team to see actions taking place as a result of the notification. GitHub also supports connecting to Microsoft Teams.
- Check your inbox (using the credentials you were provided) and see if you have been receiving build workflow emails: mail.office365.com.
- Setup a GitHub
Connectorin your team's channel for various types of alerts (e.g. Pull Requests, Build Failures, Issues created etc.) - Trigger your workflow and test that the expected alerts are created in your team's channel.
Hints
- Discuss with your team and agree upon a standard configuration of notifications and the appropriate channels for these notifications.
- One way to integrate GitHub with Microsoft Teams is by using the Microsoft Teams for GitHub or GitHub Enterprise connectors. Connectors can be added by clicking the
3 dots at the top of your Team's channel > Connectors > Search <connector-name> > Configure. Then follow the provided setup instructions, including setting up a webhook. - This task can require elevated permissions that may not be set on your account, let your coach know if you run into issues.
Helpful resources
- Choosing your notification settings
- GitHub Actions notification options
- GitHub Enterprise integration with Microsoft Teams
- Manually running a workflow
- Microsoft Teams for GitHub
- Command reference for Microsoft Teams for GitHub
Extra for experts
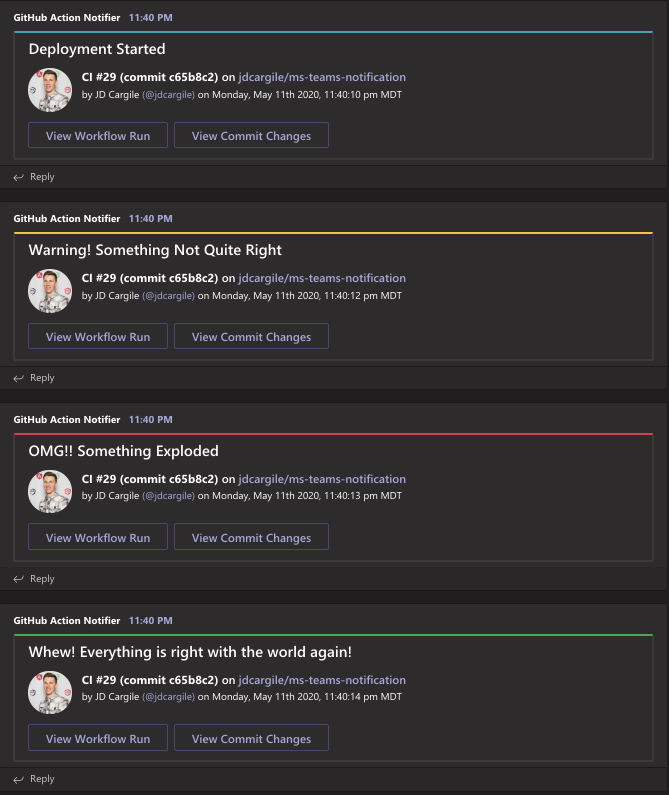
Using the pre-built connectors doesn't allow you to get notifications for events such as workflow/pipeline failures or completions. To enable build success and failure notifications for your repository using this GitHub Action, complete the following steps:
- Create an Incoming Webhook for the channel you would like the notifications in using the instructions here.
- Paste the following steps at the end of your
buildjob:
    - name: Notification for build failure
      uses: jdcargile/ms-teams-notification@v1.3
      if: failure()
      with:
        github-token: ${{ secrets.GITHUB_TOKEN }}
        ms-teams-webhook-uri: ${{ secrets.MS_TEAMS_WEBHOOK_URI }}
        notification-summary: BUILD FAILED
        notification-color: 'dc3545 '

    - name: Notification for build success
      uses: jdcargile/ms-teams-notification@v1.3
      if: success()
      with:
        github-token: ${{ secrets.GITHUB_TOKEN }}
        ms-teams-webhook-uri: ${{ secrets.MS_TEAMS_WEBHOOK_URI }}
        notification-summary: BUILD SUCCEEDED
notification-color: '28a745'- Review the instructions here for any additional steps.
- Commit your changes and watch the notifications appear.
- (Optional) Add support for deployment notification using this action